Manufacturing product configuration
Manufacturing products can be configured with lots or serial numbers for tracking, and a bill of materials (BoM) for replenishment.
Lot/serial number tracking
To optionally assign lots or serial numbers to newly manufactured products, go to . Then, select an existing product, or create a new one by clicking New. Go to the Inventory tab, and open the General Information tab. In the Track Inventory field, select By Unique Serial Number or By Lots.
Doing so enables the Lot/Serial Number field on a manufacturing order, or the Register Production instruction on a work order card in the Shop Floor app.

Lot/Serial Number field on the MO.
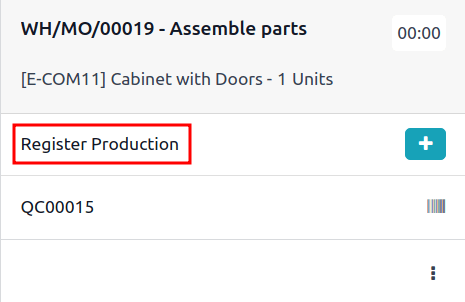
Register Production option to generate lot/serial number on a work order card.
Configure a bill of materials (BoM)
Next, a BoM must be configured for the product so NightPOS knows how it is manufactured. A BoM is a list of the components and operations required to manufacture a product.
To create a BoM for a specific product, navigate to , then select the product. On the product page, click the Bill of Materials smart button at the top of the page, then select New to configure a new BoM.

On the BoM, the Product field auto-populates with the product. In the Quantity field, specify the number of units that the BoM produces.
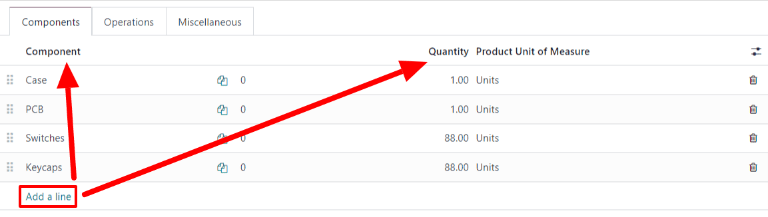
Add a component to the BoM by selecting the Components tab and clicking Add a line. Select a component from the Component drop-down menu, then enter the quantity in the Quantity field. Continue adding components on new lines until all components have been added.
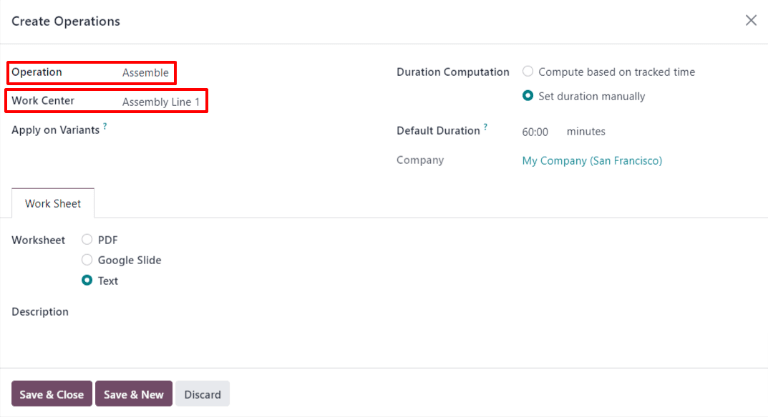
Next, select the Operations tab. Click Add a line and a Create Operations pop-up window appears. In the Operation field, specify the name of the operation being added (e.g. Assemble, Cut, etc.). Select the work center where the operation will be carried out from the Work Center drop-down menu. Finally, click Save & Close to finish adding operations, or Save & New to add more.
Important
The Operations tab only appears if the Work Orders setting is enabled. To do so, navigate to , then enable the Work Orders checkbox.
See also