Down payments
A down payment is an initial up-front payment made during the confirmation of a sales transaction. With a down payment, the buyer pays a portion of the total amount owed while agreeing to pay the remaining amount at a later date. In turn, the seller provides goods or services to the buyer upon or after accepting the down payment, trusting that the remaining amount is paid later on.
In the NightPOS Sales app, down payments can be customized to fit the needs of each individual sales transaction.
Note
Down payment invoices are not the same as payment terms or installment plans. If a single invoice issued for a sales order requires multiple payment installments, that invoice uses a payment term with an installment plan.
Create invoices
When a sales order is confirmed, the option to create an invoice becomes available via the Create Invoice button. When clicked, a Create invoice(s) pop-up appears.
Note
Invoices are automatically created as drafts so they can be reviewed before validation.
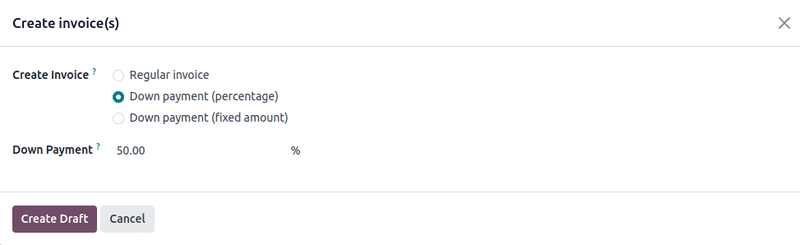
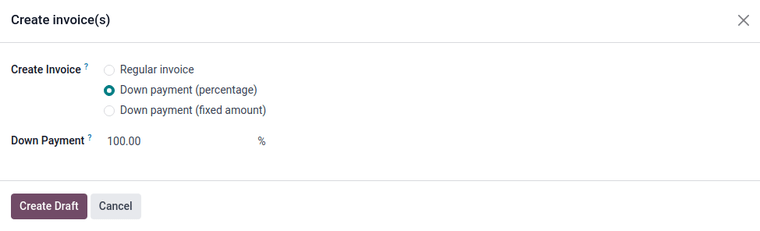
On the Create invoice(s) pop-up, there are three options to choose from in the Create Invoice field:
Regular invoice
Down payment (percentage)
Down payment (fixed amount)
Initial down payment request
On the Create invoice(s) pop-up window, the down payment options are:
Down payment (percentage)
Down payment (fixed amount)
Select a down payment option and set the desired payment, either as a percentage or a fixed amount, in the Down Payment Amount field.
Once all fields are filled in, click the Create Draft button. Upon clicking this button, NightPOS reveals the Customer Invoice Draft.
Important
If an Invalid Operation error appears, double-check that the invoicing policy is configured correctly. In some cases, for example, the invoicing policy is configured to require delivery before sending an invoice.
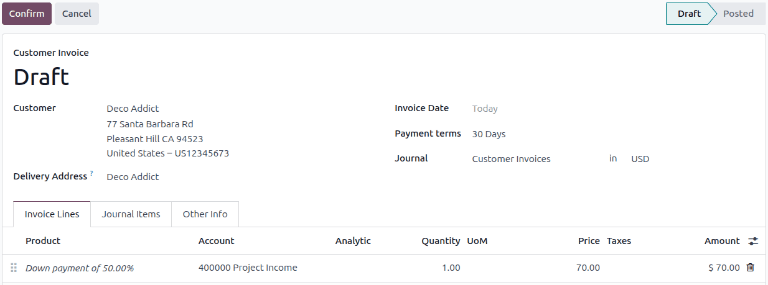
In the Invoice Lines tab of the Customer Invoice Draft, the down payment that was configured in the Create invoice(s) pop-up form appears under a new Down Payments section.
Types of down payments
NightPOS offers both fixed amounts and partial down payments (such as 30% of an order’s total).
A 100% down payment is possible and differs from a full payment of the sales order. A sales order paid through the regular invoice process does not allow any additional invoices to be generated and does not display the Create Invoice button on the sales order.
With a 100% down payment, the Create Invoice button is still displayed on the sales Order because the system expects another invoice to be created after the down payment to complete payment of the sales order.
The following are two examples of down payment amounts:
Example 1: 50% down payment
Note
This flow is also possible with the Down payment (fixed amount) option.
A customer is buying a luxury cabinet from a furniture store. The furniture store has configured the cabinet with an Invoicing Policy of Ordered quantities. The store requires a 50% down payment on all of its furniture products.
Navigate to , and create a quotation for the cabinet. Once the order is confirmed (via the Confirm button), the quotation turns into a sales order. Create an invoice by clicking Create Invoice.

On the Create invoice(s) pop-up window that appears, select Down payment
(percentage), and type 50 in the Down Payment field.
Note
The Income Account attached to the Down payment can be changed. For more information, check out the documentation on income account modification on down payments. A Down payment Account can also be set on a product category. If set, this account is prioritized for future down payments.
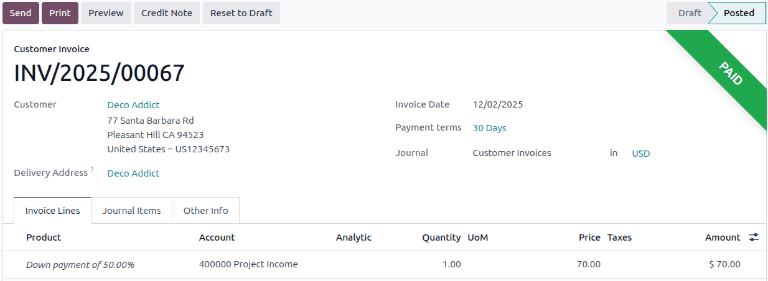
Lastly, click Create Draft to create and view the invoice draft, which includes the down payment under the Down Payments section of the Invoice Lines tab. Click Confirm and the invoice’s status changes from Draft to Posted. It also reveals a new series of buttons at the top of the page.
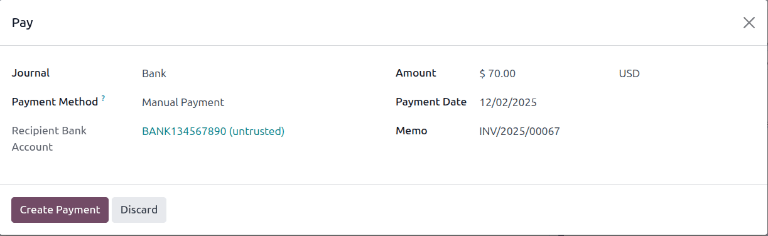
To begin the payment process, click Pay. A Pay pop-up form displays with auto-populated information. Confirm the information provided is correct and make any necessary adjustments. When ready, click the Create Payment button.
The customer invoice changes status with a green In Payment or Paid banner in the upper-right corner, depending on how the database is configured and if manual confirmation of payments is required.
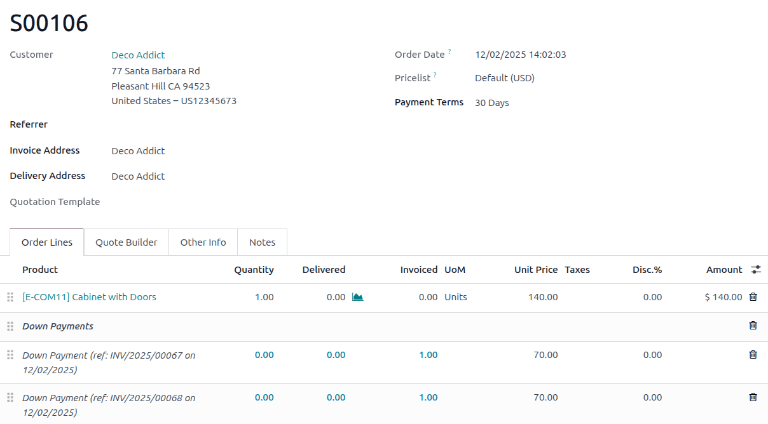
On the sales order, a new Down Payments section is present in the Order Lines tab, along with the down payment that was just invoiced and posted. When the customer wants to pay the remaining amount of the order, another invoice must be created.
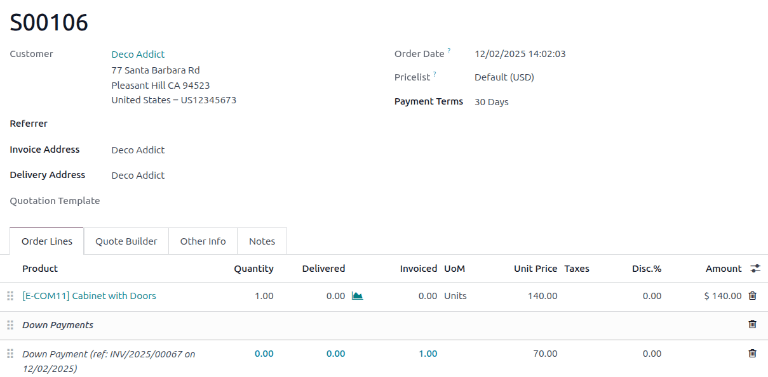
Click the Create Invoice button. On the Create invoice(s) pop-up window, there is a new field: Already invoiced and Amount to invoice.
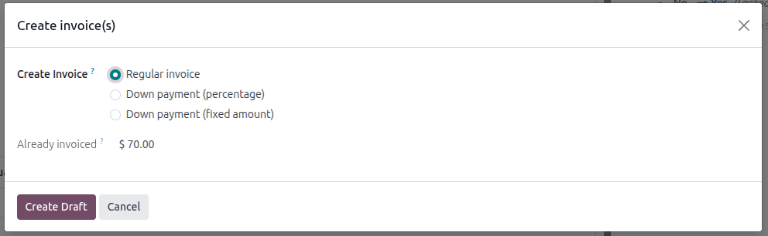
Select the Regular Invoice option. NightPOS creates an invoice for the exact amount needed to complete the total payment, as shown in the Amount to invoice field.
Click Create Draft to create a Customer Invoice Draft page. The draft lists all the invoices for that specific sales order in the Invoice Lines tab. Each invoice line item displays all the necessary information related to each invoice.
To complete the flow, click Confirm to change the status of the invoice from Draft to Posted. Then, click Pay. The Pay form appears, with all fields auto-populated with the necessary information, including the remaining amount left to be paid on the order.
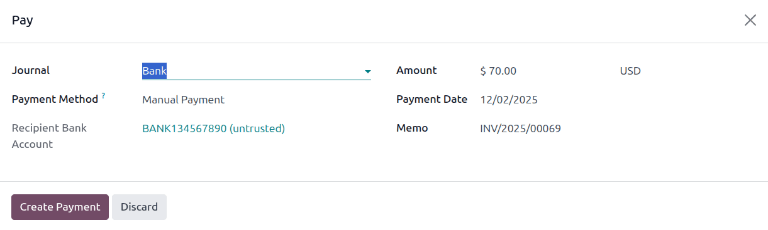
After confirming that information, click Create Payment. Doing so reveals the final Customer Invoice with a green In Payment or Paid banner in the upper-right corner, depending on how the database has configured and if manual confirmation of payments is required. Upon returning to the sales order, both down payments are present in the Order Lines tab.
At this point, the flow is complete.
Important
If a down payment is used with a product that has a Delivered quantities invoicing policy, and the cost of the product exceeds the 50% down payment, a regular invoice is created. However, for products that cost less than the 50% down payment, the down payments will not be able to be deducted when it comes time to invoice the customer.
This is because the product(s) would have to be delivered before creating the final invoice due to NightPOS not allowing negative totals for invoices. If nothing has been delivered, a Credit Note is created, which cancels the draft invoice that was created after the down payment.
To utilize the Credit Note option, the Inventory application must be installed in order to confirm the delivery. Otherwise, the delivered quantity can be entered manually directly on the sales order.
Example 2: 100% down payment
A solar panel company sells an installation service for residential homes. All installation services require a 100% down payment to cover labor costs. The company prefers down payments as customers often require customization add-ons for the service.
To configure a 100% down payment, navigate to , and create a
quotation for the product. Upon clicking the Confirm button,
the quotation turns into a sales order. At that point, an invoice can now be created by clicking
Create Invoice in the top-left corner. On the Create invoice(s) pop-up
window that appears, select Down payment (percentage), and type 100 in the
Down Payment field.
Next, click Create Draft to create an invoice draft. This will also bring the draft invoice into view, which includes the Down payment under the Down Payments section of the Invoice Lines tab. The invoice can now be confirmed and posted by clicking Confirm. Confirming the invoice changes the status from Draft to Posted. It also reveals a new series of buttons at the top of the page.
The payment can be registered by clicking the Pay button. This brings up the Pay pop-up form, which is auto-populated with the necessary information. When ready, click the Create Payment button.
After clicking Create Payment, NightPOS reveals the customer invoice, now with a green In Payment or Paid banner in the upper-right corner, depending on how the database has configured and if manual confirmation of payments is required. The process is now complete, and the 100% down payment has been successfully applied.
Income account modification on down payments
Important
To change or adjust the income account attached to down payments, the Accounting app must be installed. With the Accounting app installed, the Accounting column becomes available on the draft invoice.
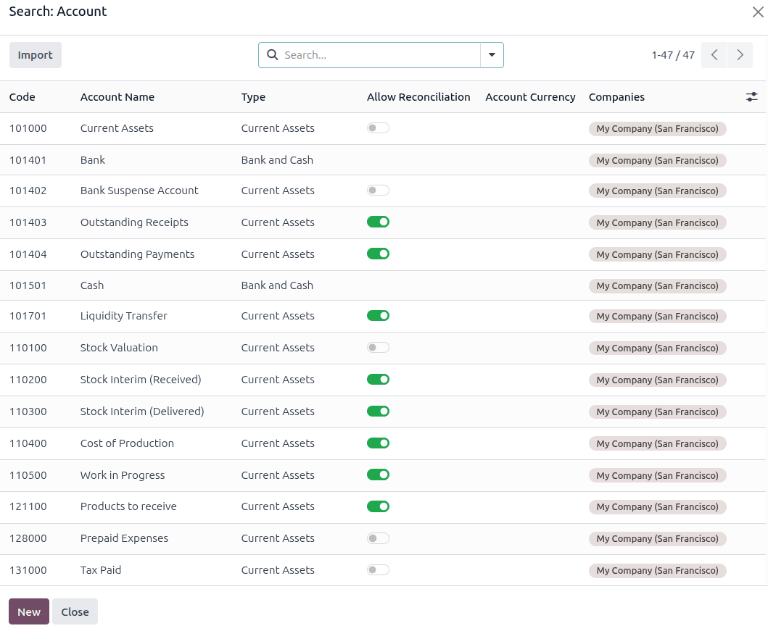
Navigate to the invoice to be modified by going to . Open an order, then click the Invoices smart button. Open an invoice, click the drop-down arrow on the entry in the Account column and click Search more… to bring up the Search: Account form. In this form, a different account can be chosen from the list of pre-existing accounts. A new account can also be created by clicking the New button.