Switch from Community to Enterprise
Depending on your current installation, there are multiple ways to upgrade your community version. In any case the basic guidelines are:
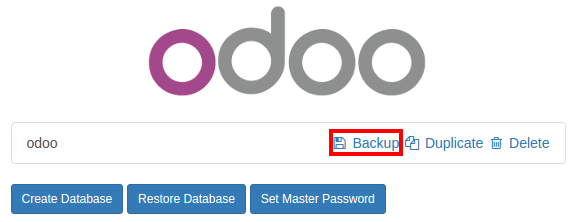
Backup your community database
Shutdown your server
Install the web_enterprise module
Restart your server
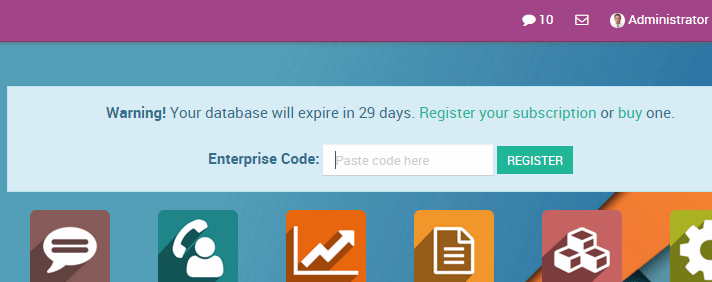
Enter your NightPOS Enterprise Subscription code
On Linux, using an installer
Backup your community database
Stop the nightpos service
$ sudo service nightpos stopInstall the enterprise .deb (it should install over the community package)
$ sudo dpkg -i <path_to_enterprise_deb>Update your database to the enterprise packages using
$ python3 /usr/bin/odoo-bin -d <database_name> -i web_enterprise --stop-after-initYou should be able to connect to your NightPOS Enterprise instance using your usual mean of identification. You can then link your database with your NightPOS Enterprise Subscription by entering the code you received by e-mail in the form input
On Linux, using the source code
There are many ways to launch your server when using sources, and you probably have your own favourite. You may need to adapt sections to your usual workflow.
Shutdown your server
Backup your community database
Update the
--addons-pathparameter of your launch command (see Source install)Install the web_enterprise module by using
$ -d <database_name> -i web_enterprise --stop-after-initDepending on the size of your database, this may take some time.
Restart your server with the updated addons path of point 3. You should be able to connect to your instance. You can then link your database with your NightPOS Enterprise Subscription by entering the code you received by e-mail in the form input
On Windows
Backup your community database
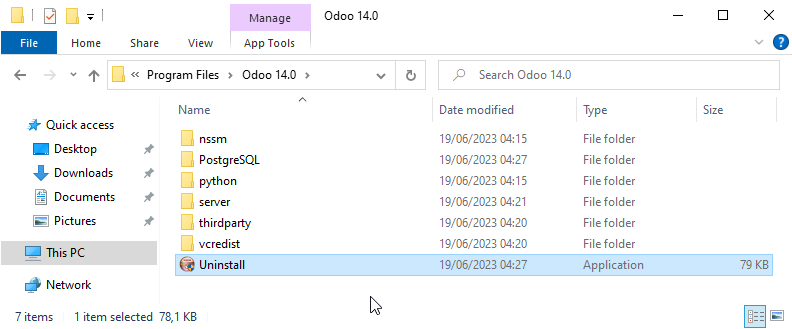
Uninstall NightPOS Community (using the Uninstall executable in the installation folder) - PostgreSQL will remain installed
Launch the NightPOS Enterprise Installer and follow the steps normally. When choosing the installation path, you can set the folder of the Community installation (this folder still contains the PostgreSQL installation). Uncheck
Start NightPOSat the end of the installation
Using a command window, update your NightPOS Database using this command (from the NightPOS installation path, in the server subfolder)
$ ..\python\python.exe odoo-bin -d <database_name> -i web_enterprise --stop-after-init
No need to manually launch the server, the service is running. You should be able to connect to your NightPOS Enterprise instance using your usual mean of identification. You can then link your database with your NightPOS Enterprise Subscription by entering the code you received by e-mail in the form input