ตัวแก้ไขออนไลน์
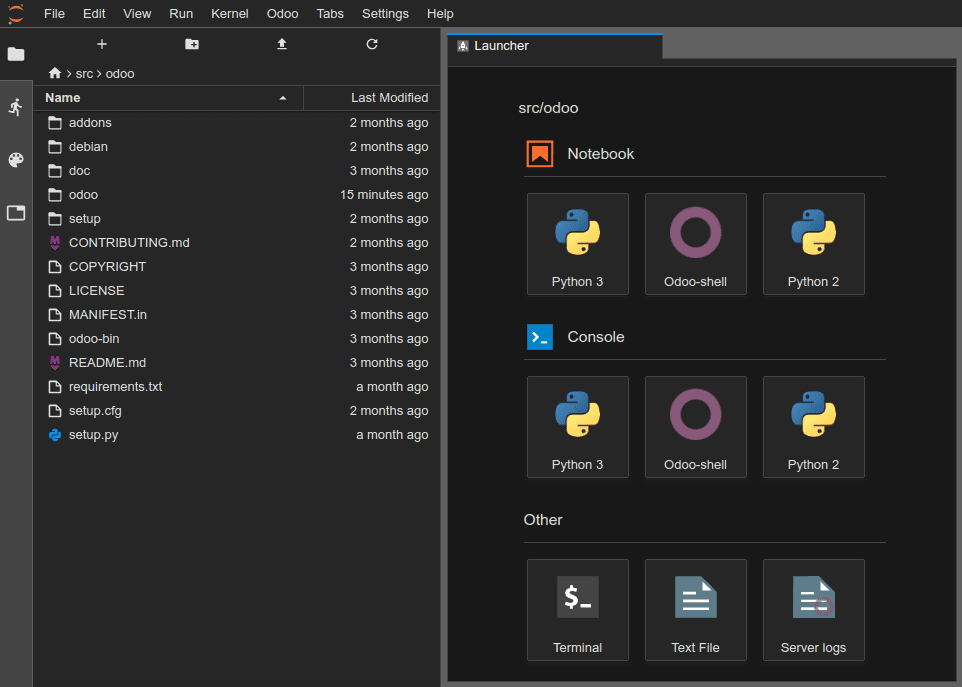
The Online Editor view allows editing the source code of your builds from a web browser. It also gives you the possibility to open terminals, Python consoles, NightPOS shell consoles, and Jupyter Notebooks.
You can access the editor of a build through the branches tab,
the builds dropdown menu, or by adding /nightpos-sh/editor to
the build's URL (e.g., https://nightpos-addons-master-1.dev.nightpos.com/nightpos-sh/editor).
การแก้ไขซอร์สโค้ด
ไดเรกทอรีการทำงานประกอบด้วยสิ่งต่อไปนี้:
.
├── home
│    └── nightpos
│         ├── src
│         │    ├── nightpos                NightPOS Community source code
│         │    │    └── odoo-bin       NightPOS server executable
│         │    ├── enterprise          NightPOS Enterprise source code
│         │    ├── themes              NightPOS Themes source code
│         │    └── user                Your repository branch source code
│         ├── data
│         │    ├── filestore           Database attachments, as well as the files of binary fields
│         │    └── sessions            Visitors and users sessions
│         └── logs
│              ├── install.log         Database installation logs
│              ├── nightpos.log            Running server logs
│              ├── update.log          Database updates logs
│              └── pip.log             Python packages installation logs
คุณสามารถแก้ไขซอร์สโค้ด (ไฟล์ภายใต้ /src) ของบิลด์สำหรับการพัฒนาและบิลด์สเตจจิ้ง สำหรับบิลด์สำหรับการใช้งานจริง ซอร์สโค้ดจะเป็นแบบอ่านอย่างเดียว เพราะการใช้การเปลี่ยนแปลงในเครื่องบนเซิร์ฟเวอร์สำหรับการใช้งานจริงไม่ใช่แนวทางปฏิบัติที่ดี
Note
Your changes won't be propagated to new builds. It is necessary to commit them to the source code if you want them to persist.
ซอร์สโค้ดของรีพอสิทอรี GitHub ของคุณอยู่ภายใต้
/src/userThe source code of NightPOS is located under:
/src/nightpos(https://github.com/nightpos/nightpos)/src/enterprise(https://github.com/nightpos/enterprise)/src/themes(https://github.com/nightpos/design-themes)
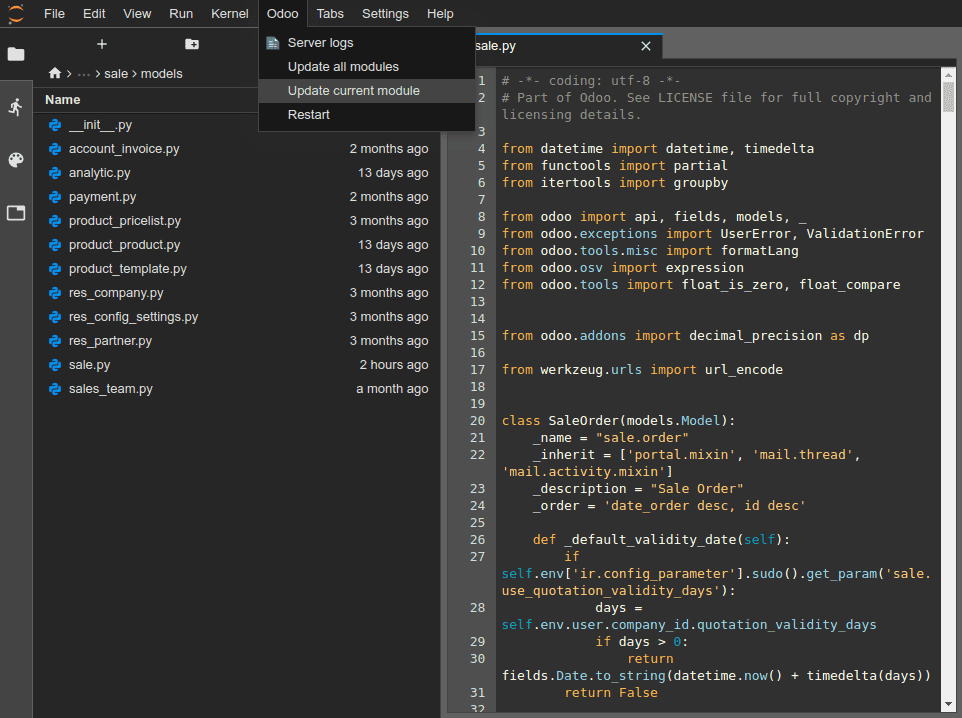
ในการเปิดไฟล์ในตัวแก้ไข ให้ดับเบิลคลิกที่ไฟล์ในแผงเบราว์เซอร์ไฟล์ จากนั้นคุณสามารถแก้ไขไฟล์ได้ ในการบันทึกการเปลี่ยนแปลงของคุณ ไปที่ หรือใช้แป้นพิมพ์ลัด Ctrl+S
If you save a Python file in your NightPOS server's addons path, NightPOS will detect it and reload automatically, meaning your changes are immediately visible.
However, if your changes are stored in the database, such as a field's label or a view, it is necessary to update the related module to apply the changes. To update the module of the currently1 open file, go to .
Tip
คุณยังสามารถรันคำสั่งต่อไปนี้ในเทอร์มินัลเพื่ออัปเดตโมดูล:
odoo-bin -u <comma-separated module names> --stop-after-init
การ commit และ push การเปลี่ยนแปลง
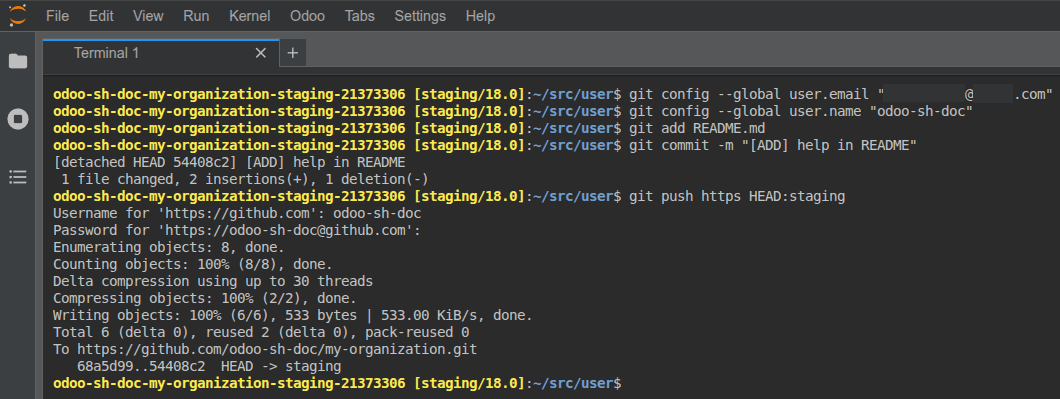
เพื่อ commit และ push การเปลี่ยนแปลงไปยัง GitHub repository ของคุณ:
เปิดเทอร์มินัลโดยไปที่
เปลี่ยนไดเรกทอรีเป็น
~/src/usercd ~/src/userระบุข้อมูลประจำตัวของคุณ
git config --global user.email "you@example.com" && git config --global user.name "Your Name"
จัดเตรียมการเปลี่ยนแปลงของคุณ
git add
Commit การเปลี่ยนแปลงของคุณ
git commit
Push การเปลี่ยนแปลงของคุณ
git push https HEAD:<branch>
ในคำสั่งนี้:
httpsคือชื่อของ HTTPS GitHub remote repository ของคุณ (เช่นhttps://github.com/username/repository.git)HEADคือการอ้างอิงถึง revision ล่าสุดที่คุณ commit<branch>ต้องถูกแทนที่ด้วยชื่อของ branch ที่คุณต้องการ push การเปลี่ยนแปลงไป ซึ่งมักจะเป็น branch ปัจจุบันหากคุณทำงานบน development build
คุณจะถูกขอให้ป้อนชื่อผู้ใช้และรหัสผ่าน GitHub ของคุณ หลังจากป้อนข้อมูลรับรองแล้ว ให้กด enter
Tip
หากคุณเปิดใช้งานการยืนยันตัวตนแบบสองปัจจัยสำหรับบัญชี GitHub ของคุณ คุณสามารถสร้าง personal access token และใช้เป็นรหัสผ่านได้ การให้สิทธิ์ repo ก็เพียงพอแล้ว
Note
ไม่สามารถยืนยันตัวตนโดยใช้ SSH ได้ เนื่องจาก private SSH key ของคุณไม่ได้ถูกเก็บไว้ใน build containers ของคุณด้วยเหตุผลด้านความปลอดภัย และไม่ได้ถูกส่งต่อผ่าน SSH agent เนื่องจากคุณเข้าถึงตัวแก้ไขผ่านเว็บเบราว์เซอร์
โฟลเดอร์ต้นทาง
~/src/userไม่ได้ถูก checkout บน branch แต่อยู่บน detached revision เนื่องจาก builds ทำงานบน revisions เฉพาะแทนที่จะเป็น branches ซึ่งหมายความว่าคุณสามารถมีหลาย builds บน branch เดียวกันได้ แต่อยู่บน revisions ที่ต่างกัน
Once your changes are pushed, according to your branch push behavior, a new build may be created. You can continue to work in the editor you pushed from, as it will have the same revision as the new build that was created. However, always make sure to be in the editor of a build using the latest revision of your branch.
คอนโซล
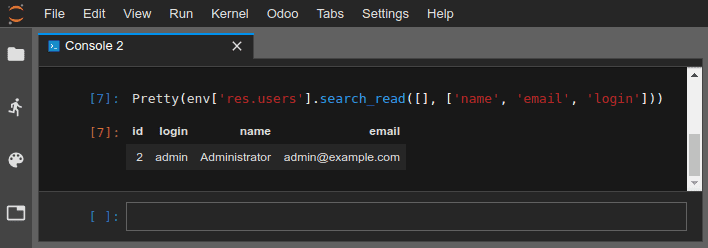
คุณสามารถเปิดคอนโซล Python ซึ่งเป็น IPython interactive shells การใช้คอนโซล Python เหล่านี้ (แทนที่จะใช้เชลล์ IPython ภายในเทอร์มินัล) ช่วยให้คุณสามารถใช้ rich display capabilities เพื่อแสดงออบเจ็กต์ในรูปแบบ HTML
Example
คลาส Pretty แสดงรายการในลักษณะที่อ่านง่าย
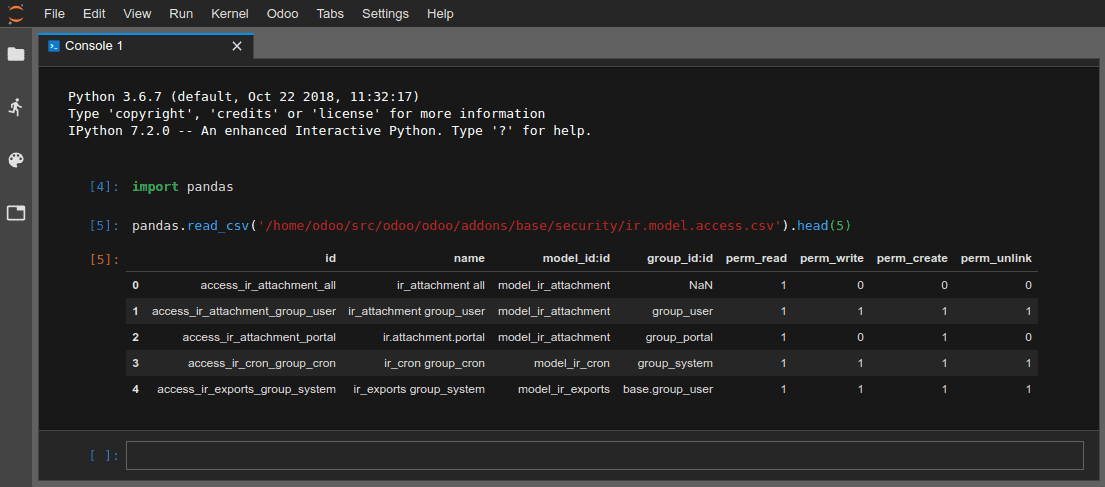
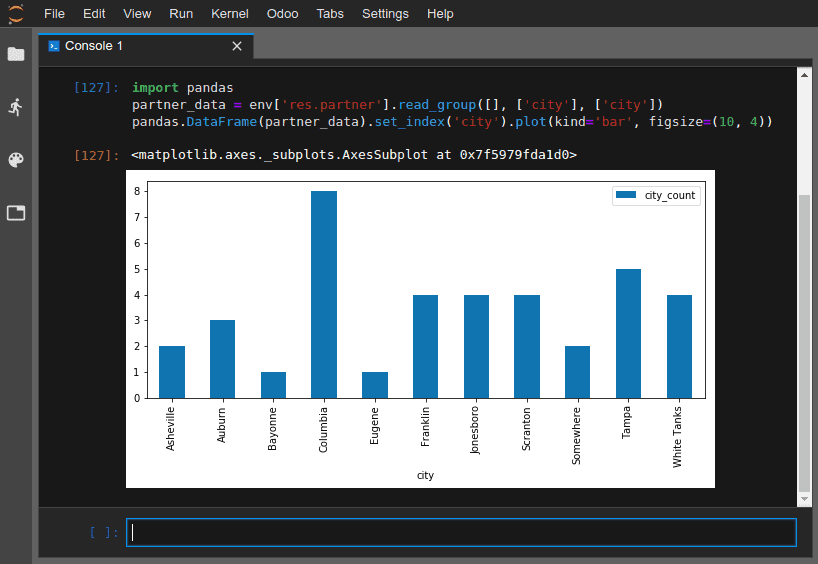
You can open NightPOS shell consoles to experiment with the NightPOS registry and model methods of your database. You can also read or write directly on your records.
Warning
In an NightPOS shell console, transactions are automatically committed. This means that changes made to records are applied to the database. For example, if you change a user's name, it will be updated in your database as well. Therefore, use NightPOS shell consoles carefully on production databases.
คุณสามารถใช้ env เพื่อเรียกใช้โมเดลของรีจิสทรีฐานข้อมูลของคุณ เช่น env['res.users']
env['res.users'].search_read([], ['name', 'email', 'login'])
[{'id': 2,
'login': 'admin',
'name': 'Administrator',
'email': 'admin@example.com'}]